
Introduction
If you’ve just installed WordPress and logged in for the first time, chances are you’re staring at the screen wondering — “What’s all this stuff on the left? Where do I even start?”
Relax. You’re not alone. Every beginner goes through that first “dashboard shock.” But once you get to know it, the WordPress Dashboard becomes your best friend — a place where you can control every part of your website without touching a single line of code.
In this guide, we’ll go step by step through the entire WordPress Dashboard, understand what each option means, and share a few pro tips to help you feel completely comfortable managing your site.
By the end, you’ll not only know what each menu item does — you’ll also know how to confidently start creating your dream website.
What Exactly Is the WordPress Dashboard?
Think of the WordPress Dashboard as the control room of your entire website. Everything — from creating posts, uploading images, changing the site design, approving comments, and installing plugins — happens here.
Whenever you log in to your site (usually through yourwebsite.com/wp-admin), the first page you see is this dashboard. It gives you a quick snapshot of your website’s health — like how many posts you’ve published, what comments are waiting for approval, and if there are any updates to install.
It’s like walking into your workspace and having all your tools neatly arranged on the left-hand side.
Dashboard Layout Overview
Before we dive into each option, let’s quickly look at the layout.
| Section | Description |
|---|---|
| Left Sidebar Menu | The vertical menu on the left side — your main control panel where you can access Posts, Media, Pages, Appearance, and other tools. |
| Main Workspace Area | The large area on the right where you see content or settings depending on what you select from the menu. |
| Top Bar | Displays shortcuts like adding new posts or checking site updates. |
| Screen Options / Help | Small tabs on the top right corner that let you customize your view or get help. |
Once you understand this basic structure, navigating WordPress becomes smooth and intuitive.
🔍 Exploring Each Dashboard Menu Option
Let’s break down the main sections one by one and understand what they do.
1. Dashboard (Home & Updates)
The first menu item — “Dashboard” — contains two main options:
- Home: Displays a quick overview of your site — recent activity, updates, and shortcuts like writing a new post.
- Updates: Shows if WordPress, plugins, or themes have newer versions available.
Keeping your WordPress and plugins updated is crucial. It ensures better security, speed, and compatibility.
👉 Pro Tip: Always take a quick backup before updating, especially if you have many plugins installed.
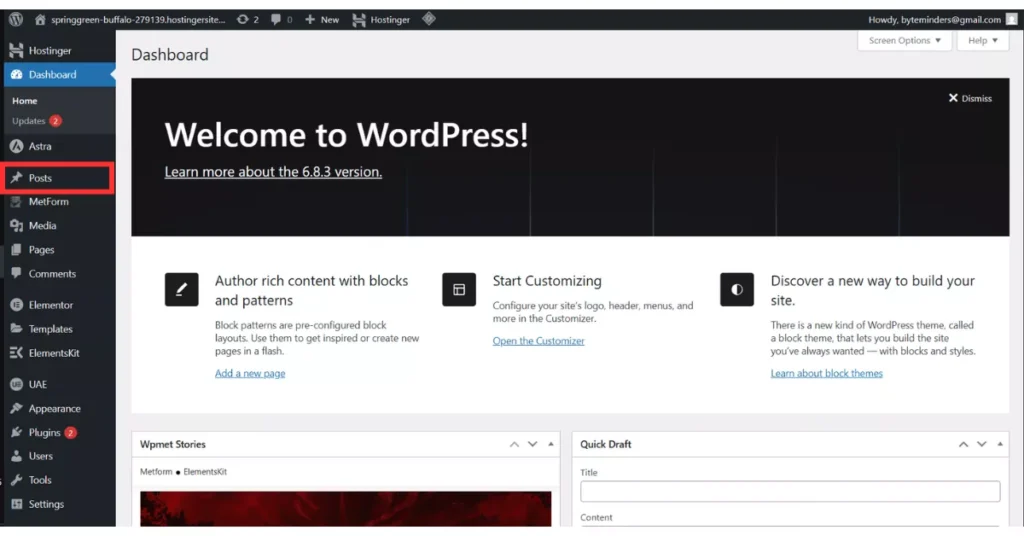
2. Posts
If your website has a blog section, this is where you’ll spend most of your time.
From here, you can:
- Add new blog posts
- Edit or delete old ones
- Organize posts using categories and tags
Categories are like folders — for example, “Tech,” “Lifestyle,” or “Tutorials.”
Tags are smaller labels that help readers and Google understand your content better.
Example: A post titled “How to Learn JavaScript” might have the category “Web Development” and tags like “JavaScript,” “Programming Basics,” or “Frontend.”
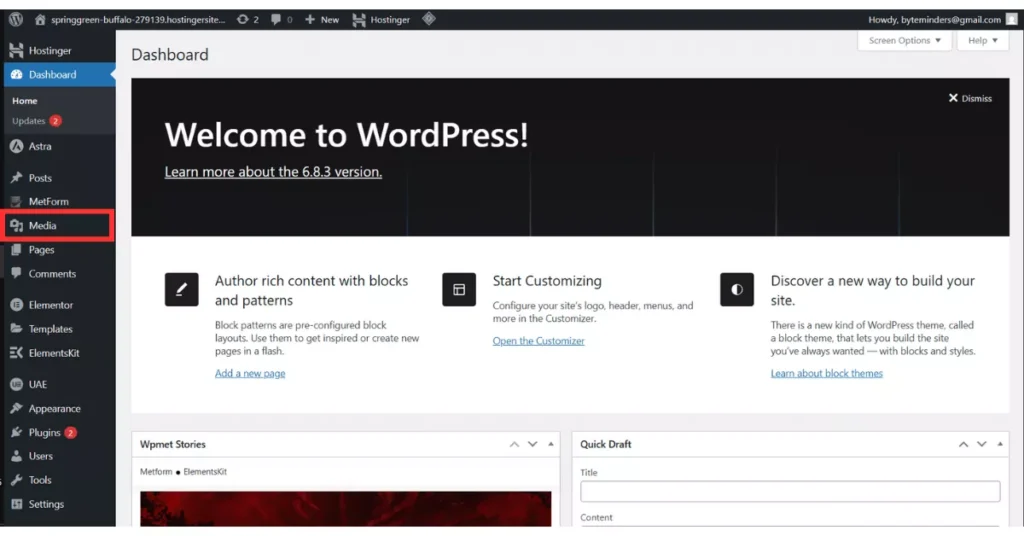
3. Media
The Media Library stores all your uploaded content — images, videos, PDFs, or infographics.
When you upload something while writing a post, it’s automatically saved here.
You can open the Media Library anytime to:
- Rename, replace, or delete files
- Check file sizes
- Copy URLs for direct use in pages or posts
👉 Pro Tip: Optimize your images before uploading using tools like TinyPNG or CompressJPEG. Smaller file sizes = faster website loading.
4. Pages
Pages are the backbone of your website. They’re different from blog posts because they hold static information that doesn’t change often — like your Home, About, or Contact page.
From this section, you can:
- Create a new page
- Edit existing ones
- Set a homepage or blog page

Think of Posts as your journal entries, while Pages are your permanent site sections.
5. Comments
If your site allows users to comment on your blog posts, all those comments appear here.
You can approve, reply, edit, mark as spam, or delete them.

Moderating your comments regularly keeps your website’s community healthy and spam-free.
You can also install plugins like Akismet or Antispam Bee to automatically filter out junk comments.
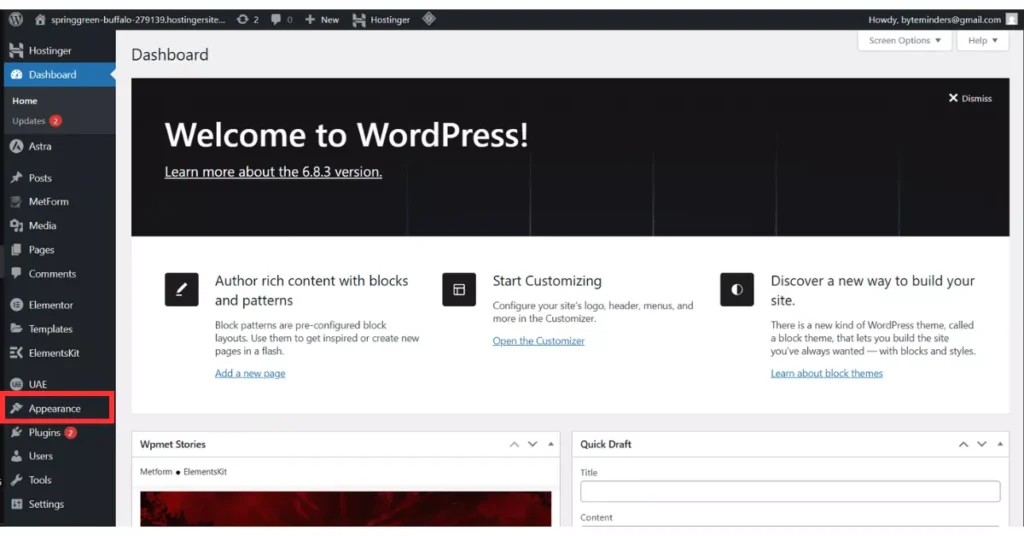
6. Appearance
This section is where your website’s look and feel are controlled.
Here you can:
- Choose and install new themes
- Customize layouts and colors
- Add widgets (like search bars or recent posts)
- Manage menus (navigation links)
- Edit your site’s header, footer, or sidebar
👉 Pro Tip: Always use a child theme when customizing so that your changes aren’t lost during theme updates.
7. Plugins
Plugins are like apps for your WordPress site.
They extend its features — whether it’s adding a contact form, improving SEO, or boosting security.
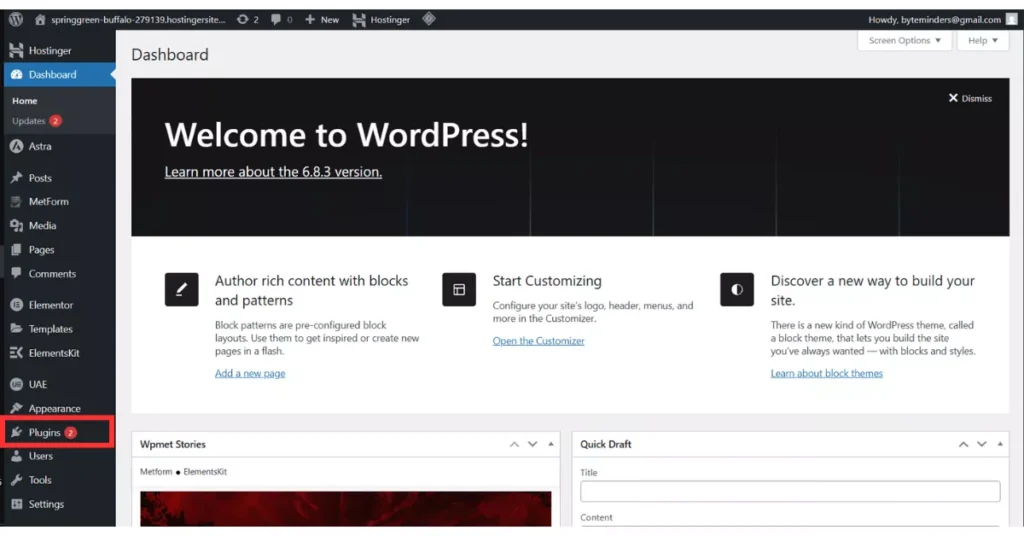
Here are some must-have plugins for beginners:
| Plugin Name | Purpose |
|---|---|
| Yoast SEO | Helps with on-page SEO and meta tags |
| Elementor | Drag-and-drop page builder |
| WPForms | Easy contact forms |
| UpdraftPlus | Backup plugin |
| Wordfence Security | Protects your site from attacks |
👉 Tip: Don’t install too many plugins. Stick to the essentials — too many can slow your website or cause conflicts.
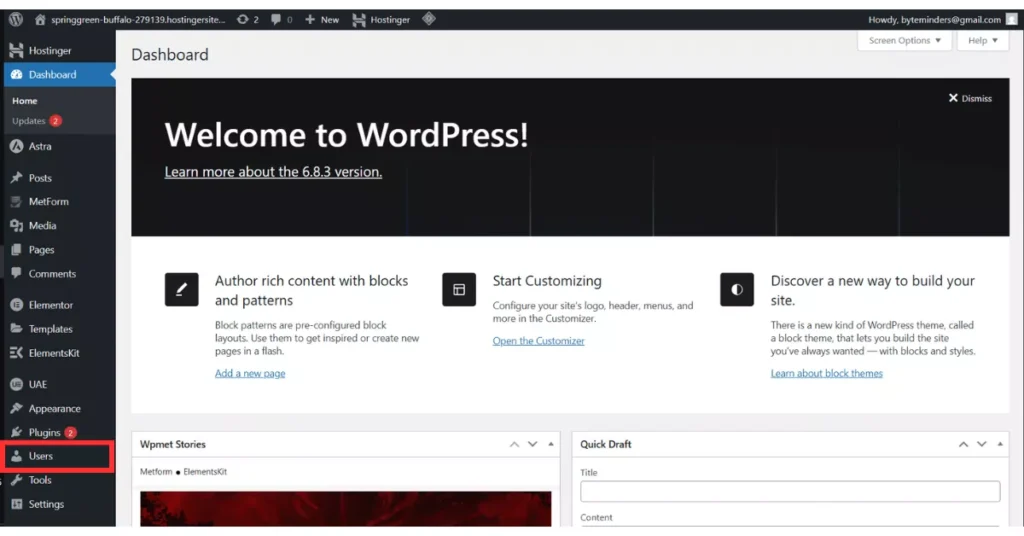
8. Users
The Users tab is where you manage who can access your website and what they’re allowed to do.
| Role | Permission Level | Description |
|---|---|---|
| Administrator | Full Access | Can manage everything including themes, plugins, and users |
| Editor | High | Can edit and publish all posts |
| Author | Medium | Can publish and edit only their own posts |
| Contributor | Limited | Can write but not publish |
| Subscriber | Minimal | Can only read and comment |
This feature is handy if you’re running a multi-author blog or a membership website.
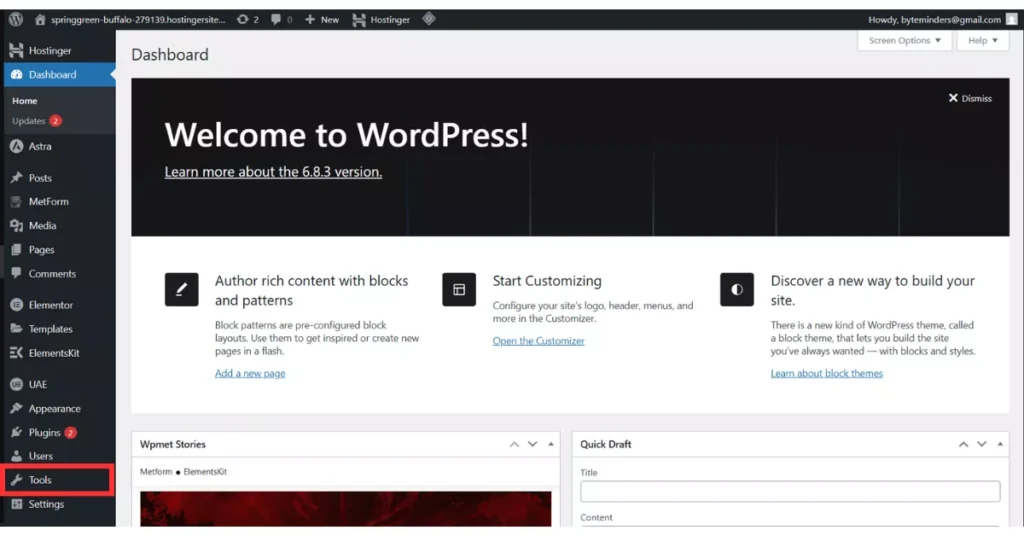
9. Tools
The Tools section offers some behind-the-scenes features.
Here you can:
- Import or export content
- Check Site Health (a tool that shows performance and security improvements)
- Export personal data (useful for GDPR compliance)
You won’t use this daily, but it’s helpful for maintenance.
10. Settings
This is where you define your site’s basic rules and structure.
You can:
- Change your site title and tagline
- Set your homepage and blog page
- Configure time zone, language, and date format
- Manage permalinks (URL structure for your posts)

👉 Pro Tip: Set your permalinks to “Post Name” format for SEO-friendly URLs.
Example: yourwebsite.com/how-to-create-a-blog
⚙️ Customizing Your Dashboard for Simplicity
When you’re just starting, the dashboard may look cluttered. The good news? You can customize it easily.
At the top right, click Screen Options to:
- Hide widgets you don’t use
- Rearrange sections
- Simplify your view
This helps you focus only on what matters and improves workflow.
Bonus Tips for Beginners
Here are some golden tips that’ll make your WordPress journey easier:
- Bookmark your login URL — it’s usually
yourwebsite.com/wp-admin. - Update regularly — outdated plugins are the number one reason for website hacks.
- Use backups — install a plugin like UpdraftPlus and schedule weekly backups.
- Keep plugins minimal — more isn’t better; it’s heavier.
- Practice often — create demo posts, try new themes, and experiment.
- Learn keyboard shortcuts — they save a lot of time in the block editor.
- Explore without fear — nothing breaks unless you save changes.
Wrapping It Up
The WordPress Dashboard might look a bit intimidating at first glance, but once you start exploring, you’ll see how logically everything is arranged. It’s like learning to drive — confusing in the first few minutes, but soon it becomes second nature.
The dashboard gives you full control — you can design, publish, and grow your website from one single panel. The key is not to rush. Take a day to click through each option, see what it does, and try small changes.
Remember, every professional web designer you admire once started right here — staring at this exact screen, wondering what all those buttons do. The only difference? They explored it, made mistakes, and learned from them. And you’re already doing the same.
So, take a deep breath, log in, and start exploring your dashboard. Your WordPress journey starts right here.
Key Takeaways
| Topic | Summary |
|---|---|
| Dashboard Overview | Central control panel for managing your website |
| Posts & Pages | Posts for blogs, Pages for static content |
| Media | Library for images, videos, and files |
| Appearance | Customize site design, menus, and layout |
| Plugins | Add features like forms, SEO, or backups |
| Users | Manage roles and permissions |
| Settings | Control global site behavior and URLs |
Helpful link