SEO Myths
Learning

SEO Myths: 8 Common Misconceptions You Should Ignore in 2025

Introduction SEO is always evolving — and so are the SEO myths surrounding it. From outdated practices to misunderstood Google guidelines, SEO misconceptions can lead to wasted efforts, lower rankings, and even penalties. If you’re relying on old advice or hearsay, 2025 is the year to leave these SEO myths behind. In this article, we’ll bust eight of the most common SEO myths that continue to mislead marketers and developers alike. Whether you’re a beginner optimizing your first blog or a seasoned strategist, these clarifications will help you make better-informed decisions and achieve long-term SEO success. Let’s dive into the truth behind the SEO myths. — — — — — — — — — — — — — — — — — — — — — Myth #1: SEO is a One-Time Task This is one of the most persistent SEO misconceptions. Many believe that once a site is optimized, the job is done. In reality, SEO is an ongoing process. Algorithms update, competitors adapt, and search trends shift. For example, a keyword that ranked on page one in 2023 might have much stiffer competition now. Also, Google prioritizes websites that regularly update their content. ✅ Tip: Regularly audit your content, update old blog posts, and stay current with algorithm changes. — — — — — — — — — — — — — — — — — — — — — Myth #2: Keywords Are All That Matter Yes, keywords are essential, but SEO has grown far beyond keyword stuffing. Google’s AI and machine learning advancements, like BERT and MUM, focus on understanding search intent and context. Overusing keywords can even hurt your SEO. It’s better to focus on natural language, semantic keywords, and writing for the user. ✅ Tip: Instead of repeating the same keyword, use related terms and answer real user questions to provide value. — — — — — — — — — — — — — — — — — — — — — Myth #3: More Links Automatically Equals Better Rankings Link-building is important, but quantity doesn’t trump quality. Google evaluates the relevance, authority, and trustworthiness of the linking domain. A handful of backlinks from high-authority websites in your niche is far more valuable than dozens from spammy or unrelated sites. ✅ Tip: Focus on creating shareable content, guest posting on reputable blogs, and building genuine relationships in your industry. — — — — — — — — — — — — — — — — — — — — — Myth #4: Duplicate Content Will Get You Penalized This SEO myths has been circulating for years. While duplicate content can cause indexing issues, it doesn’t necessarily lead to penalties unless it’s deceptive or manipulative. Google doesn’t punish duplicate content outright — it just chooses one version to show in search results. The problem is that it may not pick the version you want. ✅ Tip: Use canonical tags to specify the preferred version of a page and avoid scraping or spinning content. — — — — — — — — — — — — — — — — — — — — — Myth #5: Social Media Activity Directly Impacts SEO This is one of the trickier SEO myths. While social media signals (likes, shares, comments) aren’t direct ranking factors, they do influence SEO indirectly. Social media helps increase brand exposure, which can lead to more backlinks, more branded searches, and greater content visibility — all of which can benefit SEO. ✅ Tip: Integrate your SEO and social strategies to maximize reach, drive traffic, and improve engagement metrics. — — — — — — — — — — — — — — — — — — — — — Myth #6: Meta Descriptions Affect Search Rankings Meta descriptions do not directly influence your ranking in Google’s algorithm. However, they can impact your click-through rate (CTR), which can indirectly influence rankings. A compelling meta description may entice users to click on your link instead of your competitor’s, boosting your site’s performance in the long run. ✅ Tip: Write clear, concise meta descriptions that reflect the content’s value and include a call to action. — — — — — — — — — — — — — — — — — — — — — Myth #7: Longer Content Always Ranks Higher Length does not guarantee quality. Google prioritizes content that satisfies user intent, not word count. In some cases, short, concise answers outrank lengthy articles. That said, long-form content can perform better when it is comprehensive, well-structured, and provides more value than shorter alternatives. ✅ Tip: Don’t write for word count. Focus on content depth, structure, readability, and value. — — — — — — — — — — — — — — — — — — — — — Myth #8: You Must Submit Your Site to Google to Be Indexed Submitting your site to Google can help speed up the indexing process, especially for new sites, but it’s not necessary. Google’s bots are always crawling and will eventually find your site through backlinks and sitemap discovery. ✅ Tip: Use Google Search Console to monitor indexing, submit new URLs, and resolve crawl issues efficiently. — — — — — — — — — — — — — — — — — — — — — Conclusion Staying on top of SEO best practices means letting go of outdated beliefs. These eight SEO myths and misconceptions can prevent you from reaching your full potential if left unchecked. Instead, focus on providing valuable, user-centric content, follow Google’s official guidelines, and stay informed about algorithm updates. The more agile and informed your SEO strategy, the more likely your website is to achieve long-term success.

JavaScript tips
Learning

JavaScript Tips: Unlock the Power of 1 Underrated Feature for Better Coding

Introduction JavaScript is a language that continues to evolve and surprise developers with its depth. From handling complex UI interactions to powering entire frameworks, it’s one of the most versatile languages in modern web development. Still, among the buzz of popular libraries and frameworks, many native JavaScript tips often go unnoticed. In this post, we’re going to explore one of the most underrated features of JavaScript — one that can streamline your code, prevent common errors, and improve readability. If you’re looking for practical JavaScript tips or clever coding hacks, this guide is for you. The Hidden Gem: Optional Chaining (?.) Optional chaining is a feature that was added in ECMAScript 2020 (ES11), and it deserves far more attention than it gets. It allows developers to safely access deeply nested properties in objects without having to manually check each level for null or undefined. Let’s look at a basic example: const user = { profile: { contact: { email: “jane@example.com” } } }; console.log(user.profile?.contact?.email); // Output: “jane@example.com” console.log(user.profile?.social?.twitter); // Output: undefined (no error) Compare that to the traditional approach: if (user && user.profile && user.profile.contact && user.profile.contact.email) { console.log(user.profile.contact.email); } Optional chaining simplifies your code drastically. Among all JavaScript tips, this one helps you write cleaner, more concise logic with fewer runtime errors. Why You Should Use Optional Chaining Here’s why this feature is worth adopting immediately: ✨ Cleaner Syntax: Say goodbye to verbose, nested if statements. 🧱 Safer Code: Prevents errors like “Cannot read property of undefined.” 💡 More Readable: Makes intent clear and avoids clutter. 🌍 Supported: Widely compatible with modern browsers and environments. If you’re writing modern JavaScript, there’s no reason not to include this in your workflow. When you’re on the lookout for smart JavaScript tips, adopting optional chaining should be near the top of the list. Real-World Use Cases Optional chaining is especially handy in real-world applications, including: 1. Working with API Responses Often, data from APIs can be unpredictable. Optional chaining helps you safely access nested values without crashing your application. const userCity = apiResponse?.data?.user?.location?.city; 2. Managing Complex States in React In component-based architectures like React, application state can be deeply nested. Optional chaining avoids state-related errors and keeps your code readable. const darkModeEnabled = userSettings?.preferences?.theme?.darkMode; 3. Handling Optional Configuration In configuration files or plugin settings, not every value might be present. Optional chaining allows you to write defensive, yet clean, code. const retryAttempts = config?.network?.retry?.maxAttempts ?? 3; These are real examples where optional chaining becomes an essential part of your JavaScript toolkit. Combine with Nullish Coalescing Want to get even more out of optional chaining? Pair it with the nullish coalescing operator (??) to set default values when properties are missing. const fontSize = settings?.editor?.fontSize ?? “14px”; This line ensures that fontSize falls back to a default value if it’s null or undefined. It’s a must-have strategy in your collection of JavaScript tips. Things to Watch Out For While optional chaining is a fantastic tool, use it thoughtfully. Here are some considerations: ❌ Don’t Overuse: Avoid using it in places where a property is guaranteed to exist. 🧩 Limited Use: It can’t be used on the left-hand side of an assignment. 🧠 Readability: Overusing ?. in one expression can be confusing. Keep these best practices in mind to make the most out of this feature. Browser and Environment Support Optional chaining is supported in all major browsers and Node.js versions: Chrome 80+ Firefox 74+ Safari 13.1+ Edge 80+ Node.js 14+ If you’re targeting older environments, you can still use it with a transpiler like Babel. JavaScript Tips Recap Here’s a quick summary of why optional chaining should be in your JavaScript arsenal: 🛡️ Reduces code crashes from undefined values 📦 Saves time when working with complex or nested data 🧽 Cleans up your logic and improves maintainability 🚀 Great for both beginners and experienced developers Among the many JavaScript tips circulating the web, optional chaining is easily one of the most practical and underrated coding hacks that you should start using today. Conclusion Mastering JavaScript isn’t just about learning the syntax — it’s about discovering features that make your code cleaner, smarter, and more reliable. Optional chaining fits perfectly into this philosophy. It’s simple to implement, widely supported, and incredibly powerful in real-world applications. If you’re serious about improving your code quality and workflow, this is one of the JavaScript tips you can’t afford to ignore. Embrace it, use it, and your future self (and your debugging logs) will thank you.

CSS Tips
Learning

CSS Tips: 9 Must-Know Tricks to Elevate Your Site’s Style

Introduction In the ever-evolving world of front-end development, CSS remains one of the most powerful tools for crafting visually appealing websites. Whether you’re designing from scratch or tweaking an existing layout, knowing a few clever CSS tips can significantly enhance your site’s aesthetics and user experience. The beauty of CSS lies in its versatility. With the right web styling techniques and CSS tips, you can align elements effortlessly, create responsive grids, enhance accessibility, and add subtle animations — all without writing a single line of JavaScript. These CSS tips empower developers to approach styling with efficiency and creativity. In this guide, we’ll explore 9 must-know CSS tricks that every modern developer should have in their toolkit. Whether you’re a beginner or a seasoned pro, these techniques will help you elevate your design game and deliver a polished, professional website. — — — — — — — — — — — — — — — — — — — — — 1. Center Elements Easily with Flexbox One of the most common layout tasks in web development is centering elements — both vertically and horizontally. Traditionally, achieving perfect centering required hacks and extra wrappers. With Flexbox, it’s incredibly straightforward. Example: .container { display: flex; justify-content: center; align-items: center; height: 100vh; } With just three lines of CSS, your content is perfectly centered. This approach is ideal for login pages, hero sections, and landing banners. Why it works: Flexbox adapts to various screen sizes, making it a responsive and efficient layout model. — — — — — — — — — — — — — — — — — — — — — 2. Create Responsive Grids with CSS Grid While Flexbox is great for one-dimensional layouts, CSS Grid excels at building two-dimensional grids. It’s a go-to solution when you need complex layouts that adjust across devices. Example: .grid { display: grid; grid-template-columns: repeat(auto-fit, minmax(250px, 1fr)); gap: 20px; } This layout adjusts automatically, wrapping elements and spacing them neatly. Whether you’re designing a photo gallery or a list of blog cards, Grid makes it fluid and responsive. Pro tip: Combine Grid with media queries for even more precise control over breakpoints. — — — — — — — — — — — — — — — — — — — — — 3. Smooth Transitions Enhance User Experience CSS transitions are a subtle but powerful way to guide user interactions. Whether it’s a hover effect or a state change, transitions make the interface feel smooth and intuitive. .button { background-color: #3498db; transition: background-color 0.3s ease-in-out; } .button:hover { background-color: #2980b9; } Why use it: Smooth transitions add polish to your design, improve visual feedback, and keep users engaged. — — — — — — — — — — — — — — — — — — — — — 4. Add Depth with Box Shadows Flat design is clean, but sometimes your layout needs a bit more visual hierarchy. Box shadows are an elegant way to add depth and highlight important elements. .card { box-shadow: 0 4px 10px rgba(0, 0, 0, 0.1); padding: 20px; border-radius: 10px; } Where to use: Apply shadows to buttons, cards, or navigation bars to help them “lift” off the page and draw attention. — — — — — — — — — — — — — — — — — — — — — 5. Customize Scrollbars for a Modern UI Want your site to stand out from the rest? Customized scrollbars are an often-overlooked detail that adds a refined touch to your UI. Example for WebKit browsers: ::-webkit-scrollbar { width: 8px; } ::-webkit-scrollbar-track { background: #f1f1f1; } ::-webkit-scrollbar-thumb { background: #888; border-radius: 4px; } Keep in mind: Always test for accessibility and ensure that your custom scrollbar doesn’t hinder usability. — — — — — — — — — — — — — — — — — — — — — 6. Use clamp() for Responsive Typography Responsive font sizes used to require multiple media queries. Now, clamp() handles it in a single line. h1 { font-size: clamp(1.5rem, 4vw, 3rem); } This line says: scale the font between 1.5rem and 3rem depending on viewport width, using 4vw (viewport width) as the scaling factor. Why it matters: It keeps text legible and attractive on every screen size without extra code. — — — — — — — — — — — — — — — — — — — — — 7. Implement Dark Mode with CSS Variables Dark mode is increasingly popular, offering reduced eye strain and better battery efficiency. You can easily switch themes using CSS custom properties. :root { –bg-color: #fff; –text-color: #000; } [data-theme=”dark”] { –bg-color: #121212; –text-color: #ffffff; } body { background-color: var(–bg-color); color: var(–text-color); } Toggle the data-theme attribute to switch between light and dark modes using a simple JavaScript toggle. — — — — — — — — — — — — — — — — — — — — — 8. Use Glassmorphism with backdrop-filter Glassmorphism is a trending aesthetic that uses blur and transparency to create a “frosted glass” effect. .overlay { backdrop-filter: blur(10px); background-color: rgba(255, 255, 255, 0.2); border-radius: 12px; } Perfect for overlays, cards, or modals, this effect makes your design feel modern and immersive. Browser note: Make sure to test for browser compatibility as backdrop-filter is not supported everywhere. — — — — — — — — — — — — — — — — — — — — — 9. Gradient Text for Visual Appeal Gradients aren’t just for backgrounds anymore. You can use them to make headers pop. .text-gradient { background: linear-gradient(to right, #ff6a00, #ee0979); -webkit-background-clip: text; -webkit-text-fill-color: transparent; } Use this technique sparingly to highlight headlines or CTAs for maximum impact. — — — — — — — — — — — — — — — — — — — — — Conclusion Mastering CSS isn’t about knowing every property — it’s about using smart CSS tips to create beautiful, accessible, and high-performing websites. The tricks in this article provide a

Learning, Website Development

Content Creation: 3 Powerful Blog Ideas for Web Developers

Introduction If you are a web developer looking to attract more visitors to your blog, Content Creation plays a crucial role in boosting your online presence. Writing SEO-friendly blogs helps increase visibility, drive organic traffic, and establish authority in your field. However, many web developers struggle to find engaging topics that align with SEO best practices. In this blog post, we will explore three SEO-friendly blog ideas that can help web developers enhance their Content Creation strategy. These ideas will not only improve search engine rankings but also engage and educate your audience effectively. 1. Step-by-Step Web Development Tutorials One of the most effective ways to improve your Content Creation is by writing detailed step-by-step tutorials on various web development topics. These tutorials provide value to both beginners and experienced developers looking for solutions to specific problems. Why Tutorials Work for SEO? High Search Demand: Many developers search for step-by-step guides on coding, frameworks, and web technologies. Long-Form Content: Search engines prioritize detailed, well-structured content that provides in-depth knowledge. Engagement & Shareability: Well-explained tutorials get shared on forums, social media, and developer communities, increasing traffic. Topics You Can Cover “How to Build a Responsive Website from Scratch” “Step-by-Step Guide to Setting Up a WordPress Site” “A Complete Tutorial on JavaScript Frameworks like React or Angular” “How to Optimize a Website for Speed and Performance” SEO Tips for Tutorial Blogs Use relevant keywords like Content Creation, web development, and coding throughout the post. Structure the blog using proper headings (H1, H2, H3) and bullet points for readability. Include images, code snippets, and videos to make the tutorial more engaging. 2. Best Practices for Website Optimization Another great idea for Content Creation is writing about website optimization techniques. Many developers and website owners look for ways to improve website speed, security, and SEO rankings. Why Website Optimization Blogs Perform Well? Increased Relevance: Google and other search engines favor content that focuses on optimization and performance. High User Intent: Readers searching for optimization techniques are more likely to engage and share the content. Authority Building: Establish yourself as an expert in web development by sharing advanced optimization tips. Topics You Can Cover “10 Ways to Speed Up Your Website” “How to Improve Your Website’s SEO Performance” “A Guide to Mobile-Friendly Website Design” “Common Mistakes That Slow Down Your Website” SEO Tips for Optimization Blogs Use Content Creation and related keywords throughout the post. Include practical examples, screenshots, and case studies. Provide downloadable resources like checklists or templates to increase engagement. 3. Trends and Updates in Web Development Staying up to date with the latest trends and updates in web development is essential for developers. Creating content around new technologies, frameworks, and industry updates is a great way to attract an audience. Why Trend-Based Content is Effective? High Search Volume: Developers actively search for the latest trends and updates. Evergreen & Timely: Some topics remain relevant for years, while others gain quick traction. Competitive Advantage: Covering emerging trends before competitors can help you rank higher. Topics You Can Cover “Content Creation: 3 Powerful Blog Ideas for Web Developer“ “The Future of Web Development: What’s Next?” “Latest Updates in HTML, CSS, and JavaScript” “How AI is Changing the Web Development Industry” SEO Tips for Trend-Based Blogs Optimize for trending keywords along with Content Creation. Write in-depth analysis and predictions to add value to your readers. Keep updating the content to ensure it remains relevant over time. Conclusion Creating SEO-friendly blogs as a web developer is crucial for increasing visibility and engagement. By focusing on step-by-step tutorials, website optimization techniques, and the latest trends, you can build a strong content strategy that attracts more readers. Remember to integrate Content Creation naturally throughout your blog posts and follow SEO best practices, such as keyword optimization, structured formatting, and multimedia integration. With consistency and valuable insights, your blog will grow into a trusted resource in the web development community. Start writing today and make your Content Creation efforts count!

Secure Website Guide
Learning

Secure Website Guide: 1 Simple Trick That Instantly Boosts Protection

Introduction The Secure Website Guide is the starting point for anyone looking to protect their digital presence. In a world full of cyber threats, ensuring the safety of your website should be your top priority. Whether you run a personal blog, an eCommerce platform, or a business website, following a Secure Website Guide will help you safeguard your content, users, and data. Fortunately, there’s one simple trick that will dramatically improve your website’s security almost instantly. Let’s dive into the first step of the Secure Website Guide that every site owner should take. 🔐 The Simple Trick: Install an SSL Certificate When it comes to website security, installing an SSL (Secure Sockets Layer) certificate is one of the easiest yet most effective steps to take. SSL encrypts the connection between your website and your visitors, ensuring that sensitive information—such as passwords, payment details, and personal data—is securely transmitted. Once you install an SSL certificate, your website will switch from HTTP to HTTPS, and a small padlock icon will appear next to the URL in the browser. This signals to your visitors that their data is protected, building trust and ensuring a safe browsing experience . ✅ Why SSL Should Be Your First Step in the Secure Website Guide The Secure Website Guide places SSL installation at the very top for several reasons: Encryption: SSL encrypts all data exchanged between your website and its users. Trustworthiness: Websites with HTTPS are recognized as secure by browsers, reducing the risk of security warnings that can scare away visitors. SEO Boost: SSL is a ranking signal for Google, meaning that securing your site with HTTPS can improve your SEO rankings. Data Protection: SSL protects user information from hackers and prevents man-in-the-middle attacks. 💡 Real-World Example: Imagine a visitor submits sensitive information (like a credit card number) on your site. Without SSL, that data is vulnerable. With SSL, everything is encrypted, keeping their data safe. 🛠️ How to Install an SSL Certificate (Step-by-Step) This Secure Website Guide wouldn’t be complete without showing you how to install an SSL certificate. The best part is that most hosting providers offer free SSL certificates via Let’s Encrypt, making it easy for you to implement this protection. Here’s how you can install it: Log in to your hosting control panel (e.g., cPanel, SiteGround, Bluehost). Find the SSL/TLS or Security section. Select your domain and enable the SSL certificate. If you’re using a content management system (CMS) like WordPress, install a plugin like Really Simple SSL to help manage the transition. Redirect all HTTP traffic to HTTPS by updating your settings. Use SSL Labs’ SSL Test to ensure the certificate is correctly installed and functioning. With just a few simple steps, you’ll have a secure website in place, ready to protect both your site and visitors. ⚠️ Common Mistakes to Avoid in Your Secure Website Guide Even the most effective Secure Website Guide can be rendered ineffective if certain mistakes are made. Avoid these common pitfalls: Not Redirecting HTTP to HTTPS: Ensure all pages automatically load via HTTPS. Mixed Content: Don’t use HTTP links (images, scripts, etc.) on your HTTPS pages, as this can undermine security. Expired Certificates: Make sure your SSL certificate is renewed automatically to avoid losing your secure status. Old Encryption Protocols: Enable TLS 1.2 or higher for the most secure encryption. By staying aware of these issues, your Secure Website Guide will ensure maximum protection for your website. 🔐 Additional Security Tips for a Complete Secure Website Guide While installing SSL is a crucial first step, this Secure Website Guide recommends taking further action to enhance your website’s security: Use strong, unique passwords for your admin accounts. Enable two-factor authentication (2FA) for all critical logins. Keep your website’s content management system (CMS), themes, and plugins up to date. Use a security plugin or firewall to protect against malicious traffic. Limit the number of login attempts to reduce the risk of brute-force attacks. Regularly back up your website data and store backups securely. By following these steps in your Secure Website Guide, you’ll build a multi-layered defense for your website. 📈 How SSL Impacts SEO and the Secure Website Guide One of the main benefits of SSL, highlighted in this Secure Website Guide, is its impact on search engine optimization (SEO). Google prioritizes HTTPS websites over HTTP sites, meaning that SSL can actually improve your website’s ranking on Google search results. SSL increases trust, leading to better user engagement. Sites with HTTPS are less likely to have high bounce rates since users feel safer. Improved trust can lead to higher conversion rates on sales or contact forms. If you’re serious about building a successful website, implementing SSL through the Secure Website Guide is a simple but powerful step to take. 🔗 Recommended Resource Want to dive deeper into SSL and HTTPS best practices? Check out Google’s official guide on HTTPS here: Google’s HTTPS Guide This resource offers more advanced technical insight into HTTPS and explains why encryption is critical for web security. ✅ Conclusion In this Secure Website Guide, you’ve learned that one of the simplest and most effective ways to enhance your website security is by installing an SSL certificate. This single action not only protects user data but also improves trust, boosts SEO, and strengthens your site against hackers. Best of all, it’s a free, easy, and quick solution that makes a huge difference. Don’t wait until it’s too late—take action today, and follow this Secure Website Guide to secure your website and build a safer, more trusted online presence.

HTML Basics
Learning

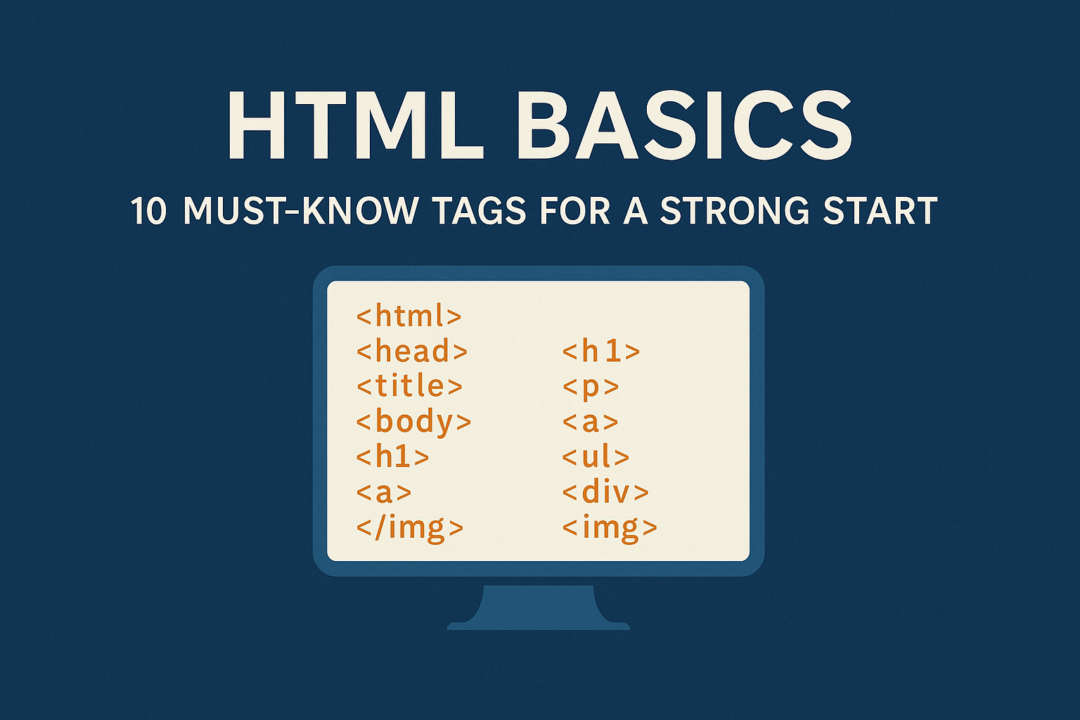
HTML Basics: 10 Must-Know Tags for a Strong Start

Introduction If you’re diving into web development, understanding HTML basics is your essential first step. HTML — short for HyperText Markup Language — is the structural foundation of every website you visit. Whether you’re building a simple blog or a dynamic web application, mastering the basic HTML tags will help you create clean, well-structured, and accessible web pages. In this guide, we’ll explore 10 HTML tags every developer should know to build a strong foundation in modern web development. Let’s get started. — 1. <html> — The Root of It All Every HTML page begins with the <html> tag. It wraps around all the content on your page and tells the browser, “Hey, this is an HTML document!” Example: html CopyEdit <!DOCTYPE html> <html> <!– All your content goes here –> </html> 🛠️ Tip: Don’t forget the <!DOCTYPE html> declaration at the very top — it helps browsers display your content correctly. — 2. <head> — Behind-the-Scenes Info The <head> tag contains metadata: page titles, character encoding, external file links, and more. This section isn’t visible on the webpage, but it plays a critical role. Example: html CopyEdit <head> <meta charset=”UTF-8″> <meta name=”description” content=”Learn HTML basics for better web development.”> <title>HTML Basics Guide</title> </head> 💡 SEO Tip: Use a descriptive <meta> tag for better search engine indexing. — 3. <title> — The Page’s Name The <title> tag defines the title of your webpage — it appears in the browser tab and in search engine results. Example: html CopyEdit <title>HTML Basics: Top 10 Tags to Learn</title> 🔍 Keep it short and include your focus keywords, like “HTML basics.” — 4. <body> — Everything You Can See Everything visible on the page — text, images, videos, and links — is placed inside the <body> tag. Example: html CopyEdit <body> <h1>Welcome to My Site</h1> <p>This is a sample paragraph.</p> </body> ✨ This is where your website comes to life! — 5. <h1> to <h6> — Headings for Structure Use heading tags to organize your content. <h1> is the most important, and <h6> is the least. Example: html CopyEdit <h1>HTML Basics</h1> <h2>Subtopic</h2> 🧠 Best Practice: Use only one <h1> per page for SEO. — 6. <p> — Paragraphs for Content The <p> tag defines paragraphs, making text easier to read. Example: html CopyEdit <p>Learning HTML basics is the first step in web development.</p> 📝 Tip: Break text into smaller paragraphs to improve mobile readability. — 7. <a> — Anchor Links The <a> tag allows you to add links to other pages or websites. Example: html CopyEdit <a href=”https://example.com”>Visit Example Site</a> 🔗 Pro Tip: Add target=”_blank” to open links in a new tab. — 8. <img> — Adding Images Use the <img> tag to display images. Always include the alt attribute for accessibility and SEO. Example: html CopyEdit <img src=”html-basics.png” alt=”HTML basics screenshot”> 🖼️ The alt attribute helps visually impaired users and improves SEO. — 9. <ul>, <ol>, and <li> — Lists for Clarity Lists help organize information into bullet points or numbered steps. Unordered list (bullets): html CopyEdit <ul> <li>HTML</li> <li>CSS</li> <li>JavaScript</li> </ul> Ordered list (numbers): html CopyEdit <ol> <li>Write your HTML</li> <li>Style with CSS</li> <li>Add interactivity with JS</li> </ol> ✅ Use lists to break down instructions or organize information clearly. — 10. <div> and <span> — For Grouping and Styling These tags don’t carry specific meaning, but they’re used to structure and style content. Example: html CopyEdit <div class=”container”> <p>This is a content section.</p> </div><span style=“color:red;”>Important!</span> 🎨 Pair with CSS to create layouts and highlight elements. — Final Thoughts Mastering HTML basics is your first step toward becoming a confident web developer. These 10 essential tags provide the building blocks of every modern website. Whether you’re structuring content, adding links, or embedding images, these tags form the core of your web development toolkit. By practicing regularly and combining these tags with CSS and JavaScript, you’ll soon be able to build beautiful, responsive websites from scratch. —

Business Growth Article, Learning, SEO, Website Development

Blog Monetization: The Smartest Way to Make Money in Just 30 Days!

Introduction Are you looking for a quick and effective way to start earning from your blog? Blog monetization is a dream for many bloggers, but it often seems complicated and time-consuming. The good news is that you don’t need years to start making money from your blog. In just 30 days, you can implement a powerful strategy that generates income consistently. In this guide, we will focus on Affiliate Marketing – one of the smartest and fastest ways to achieve blog monetization. With the right approach, you can start earning commissions within a month. Let’s dive into the details and explore how you can use affiliate marketing to monetize your blog effectively. Why Choose Affiliate Marketing for Blog Monetization? Affiliate marketing is a simple yet powerful method of blog monetization. Here’s why it works so well: Low Investment: You don’t need to create your own product. Passive Income: Once set up, it generates revenue on autopilot. Scalable: You can promote multiple products and increase earnings over time. Wide Opportunities: There are thousands of affiliate programs in every niche. Now, let’s break down how you can set up affiliate marketing and start earning in just 30 days. Step 1: Choose the Right Niche and Affiliate Program The first step in blog monetization is selecting the right niche and affiliate program. Here’s how: Pick a Profitable Niche: Choose a niche that has demand and profitable affiliate programs. Examples include: Health & Fitness Technology & Gadgets Personal Finance Digital Marketing Lifestyle & Fashion Find Affiliate Programs: Sign up for reputable affiliate programs such as: Amazon Associates ShareASale CJ Affiliate ClickBank Impact Make sure the products align with your blog content to ensure authenticity and higher conversions. Step 2: Create High-Quality Content with Affiliate Links Content is key to blog monetization. Your goal is to create content that adds value to your readers while subtly promoting affiliate products. Types of Content That Work Best: Product Reviews: Write detailed reviews about products you’ve used. Comparison Articles: Compare two or more products to help readers make a decision. How-To Guides: Provide tutorials that include affiliate product recommendations. Listicles: Create lists of top products, like “Top 10 Gadgets for Bloggers.” Make sure to naturally insert affiliate links in your content. Avoid over-promotion, as it can reduce trust. Step 3: Optimize for SEO to Drive Traffic Without traffic, blog monetization is impossible. Focus on SEO to get organic visitors from Google. SEO Tips for Affiliate Blogs: Keyword Research: Use tools like Ahrefs, SEMrush, or Ubersuggest to find high-volume keywords. On-Page SEO: Optimize title tags, meta descriptions, and headings with relevant keywords. Internal Linking: Link to other related posts on your blog to boost engagement. Speed Optimization: Ensure your blog loads quickly to improve user experience. A well-optimized blog will attract more readers, increasing your chances of affiliate sales. Step 4: Promote Your Content for Faster Monetization Even with great content, you need to actively promote your blog for quicker blog monetization. Effective Promotion Strategies: Social Media Marketing: Share blog posts on Facebook, Twitter, LinkedIn, and Instagram. Email Marketing: Build an email list and send newsletters featuring your affiliate products. Pinterest: Create eye-catching pins that lead to your affiliate blog posts. YouTube: Make video content that complements your blog and includes affiliate links. Forums & Q&A Sites: Answer relevant questions on Quora and Reddit with links to your blog. These strategies will help drive targeted traffic, increasing your affiliate conversions. Step 5: Track Performance and Optimize for Higher Earnings Once your blog starts getting traffic, it’s important to analyze performance and improve your strategy. Key Metrics to Track: Click-Through Rate (CTR): Check how many people click on your affiliate links. Conversion Rate: Monitor how many visitors make a purchase. Traffic Sources: Identify where your traffic is coming from. How to Optimize? Improve CTA (Call-to-Action) placement. Test different affiliate products to see what works best. Update old blog posts to keep content fresh and relevant. By continuously analyzing and optimizing, you can increase your affiliate income significantly. Conclusion: Start Your Blog Monetization Journey Today! Affiliate marketing is one of the smartest and fastest ways to achieve blog monetization. By following the steps outlined above, you can start earning from your blog within 30 days. Quick Recap: Choose the right niche and affiliate program. Create high-quality content with affiliate links. Optimize for SEO to drive traffic. Promote your content for faster results. Track performance and optimize for better earnings. Blog monetization doesn’t have to be complicated. Start implementing these strategies today and watch your blog turn into a profitable asset!

Learning, Website Development

Website Speed Optimization: 5 Best Tools to Check & Improve Speed 🚀

Introduction In today’s digital world, Website Speed Optimization is a crucial factor that directly impacts user experience, SEO rankings, and conversion rates. If your website takes too long to load, visitors might leave before even seeing your content. This is why checking website speed regularly is essential. To help you improve Website Speed Optimization, we have compiled a list of the 5 best tools to check website speed. These tools provide detailed insights into what’s slowing down your site and offer recommendations to fix performance issues. 1. Google PageSpeed Insights Google PageSpeed Insights (PSI) is one of the most popular tools for measuring website speed. It analyzes your website’s performance on both mobile and desktop devices and provides optimization suggestions. Features of Google PageSpeed Insights: Provides a performance score based on Lighthouse analysis. Highlights Core Web Vitals, including Largest Contentful Paint (LCP), First Input Delay (FID), and Cumulative Layout Shift (CLS). Suggests optimization techniques like image compression, server response time improvements, and lazy loading. Offers field data and lab data for deeper performance insights. How It Helps in Website Speed Optimization Identifies render-blocking resources that slow down website speed. Offers suggestions for reducing unused JavaScript and CSS. Helps in optimizing server response time and leveraging browser caching. 2. GTmetrix GTmetrix is another powerful tool that helps analyze website speed and provides actionable recommendations for Website Speed Optimization. Features of GTmetrix: Generates a performance score based on Lighthouse metrics. Provides a Waterfall Chart to show how different resources load. Allows you to test website speed from different locations and devices. Offers video replays to identify loading issues. How It Helps in Website Speed Optimization Helps in reducing Time to First Byte (TTFB). Detects slow-loading elements like unoptimized images and scripts. Provides recommendations for enabling GZIP compression and browser caching. 3. Pingdom Speed Test Pingdom is a user-friendly tool that provides detailed reports on website loading speed and performance bottlenecks. Features of Pingdom: Measures load time, performance grade, and page size. Provides a content size breakdown (HTML, JavaScript, CSS, images, fonts, etc.). Shows request breakdown to analyze which elements take the most time to load. Allows you to test website speed from multiple global locations. How It Helps in Website Speed Optimization Helps identify slow-loading scripts and third-party requests. Suggests reducing DNS lookups and HTTP requests. Provides actionable insights to improve overall site speed. 4. WebPageTest WebPageTest is an advanced tool that allows users to conduct in-depth Website Speed Optimization tests. Features of WebPageTest: Offers multi-step tests to analyze website performance. Allows testing from multiple devices, browsers, and network conditions. Provides a detailed waterfall analysis to track every request. Offers Core Web Vitals monitoring. How It Helps in Website Speed Optimization Identifies slow server response times and unoptimized assets. Offers recommendations for reducing render-blocking resources. Helps improve Time to Interactive (TTI) and First Contentful Paint (FCP). 5. Lighthouse (Google Chrome DevTools) Lighthouse is an open-source tool built into Google Chrome that helps analyze and improve Website Speed Optimization. Features of Lighthouse: Generates performance, accessibility, and SEO reports. Analyzes First Paint, First Contentful Paint, and Speed Index. Provides actionable suggestions for improving website speed. Can be accessed via Google Chrome DevTools, command line, or Node.js. How It Helps in Website Speed Optimization Helps in reducing JavaScript execution time. Identifies unnecessary third-party scripts affecting speed. Suggests techniques for improving overall performance metrics. Conclusion Website Speed Optimization is essential for improving user experience, SEO rankings, and conversion rates. The tools mentioned above—Google PageSpeed Insights, GTmetrix, Pingdom, WebPageTest, and Lighthouse—help you analyze and enhance your website’s speed effectively. By regularly testing your website’s performance and implementing optimization techniques, you can significantly improve your website’s load time, reduce bounce rates, and provide a seamless user experience. Quick Recap of the Best Tools for Website Speed Optimization: Google PageSpeed Insights – Best for Google Core Web Vitals analysis. GTmetrix – Best for waterfall analysis and detailed performance insights. Pingdom Speed Test – Best for identifying slow-loading page elements. WebPageTest – Best for advanced multi-step testing. Lighthouse – Best for in-depth Chrome-based performance testing. Regular speed checks and optimizations will help ensure that your website loads fast, performs well, and ranks higher in search engines. Start testing your website speed today and improve your overall online performance!

Learning, Website Development

Automation: 1 Powerful Way to Automate WordPress Updates

Introduction WordPress is one of the most popular content management systems (CMS) used by millions of website owners worldwide. Keeping WordPress updated is crucial for security, performance, and new features. However, manually updating WordPress, plugins, and themes can be time-consuming. That’s where automation comes in. In this blog post, we will discuss one easy way to automate WordPress updates and why automating updates is essential for your website’s smooth functioning. By the end of this guide, you will know how to set up automation for updates and ensure your website remains secure and efficient. Why Automate WordPress Updates? Automation is essential for WordPress maintenance. Here are some key reasons why you should consider automating updates: Security: Outdated WordPress core, plugins, and themes can make your site vulnerable to hackers. Performance: Updates often come with performance improvements and bug fixes. New Features: Automating updates ensures you always have the latest features without manually checking. Time-Saving: It reduces manual work and lets you focus on content creation and business growth. Reduced Errors: Automated updates prevent human errors that may occur during manual updates. Now, let’s explore one easy way to automate WordPress updates. The Easiest Way to Automate WordPress Updates The simplest and most effective way to automate WordPress updates is by using the Easy Updates Manager plugin. This plugin allows you to take full control of updates without needing technical skills. Step-by-Step Guide to Setting Up Automation Using Easy Updates Manager Step 1: Install and Activate Easy Updates Manager Log in to your WordPress Dashboard. Navigate to Plugins > Add New. Search for Easy Updates Manager. Click Install Now, then click Activate. Step 2: Configure Update Settings After activation, go to Dashboard > Updates Options. You will see different update settings: WordPress Core Updates Plugin Updates Theme Updates Translation Updates Enable automatic updates for all the components you want. Step 3: Enable Auto Updates for Plugins and Themes In the plugin dashboard, find Plugins & Themes settings. Set it to Enable Automatic Updates. If you want more control, you can enable updates only for specific plugins and themes. Step 4: Configure Advanced Settings (Optional) Enable Logging to keep track of all updates. Set up Notifications to receive update alerts via email. If you are using a staging environment, test updates before applying them to your live website. Step 5: Save Your Settings Once you have configured all settings, click Save Changes. Your WordPress site will now automatically update based on your preferences. Alternative Methods to Automate WordPress Updates 1. Using WordPress Built-in Auto-Update Feature WordPress has a built-in feature for automatic updates. To enable it: Navigate to Dashboard > Updates. Enable automatic updates for WordPress core, plugins, and themes. This is useful for small websites but lacks customization options. 2. Using Managed WordPress Hosting Many hosting providers like Kinsta, WP Engine, and SiteGround offer automated updates as part of their managed WordPress hosting services. Pros: Hosting providers test updates before applying them. Cons: You need a premium hosting plan. 3. Using WP-CLI for Advanced Users For developers and advanced users, WP-CLI (WordPress Command Line Interface) allows running update commands like: wp core update wp plugin update –all wp theme update –all This method is technical and requires SSH access. How to Ensure Safe Automation of WordPress Updates While automation is beneficial, you must take precautions to avoid website issues: Backup Your Website Regularly Use plugins like UpdraftPlus or VaultPress to schedule backups before updates. Use a Staging Environment Test updates on a staging site before applying them to the live website. Enable Logging and Notifications Keep track of updates and get notified if something goes wrong. Disable Auto Updates for Critical Plugins Some plugins may not be compatible with auto-updates. Review them manually. Conclusion Automating WordPress updates is a game-changer for website management. The Easy Updates Manager plugin provides an effortless way to automate updates and keep your site secure and optimized. By following the simple steps above, you can enable automation, save time, and ensure your website remains up to date without manual intervention. So, why wait? Set up WordPress update automation today and enjoy a hassle-free website maintenance experience!  

Learning, Website Development

PHP Development: 11 Essential PHP Functions to Improve Your Web Development Skills

Introduction PHP is one of the most widely used programming languages for web development. It offers a vast collection of built-in functions that make development faster and more efficient. If you are working in PHP Development, mastering some essential PHP functions can help you write better code and enhance your web applications. In this blog post, we will discuss 11 powerful PHP functions that will improve your PHP Development skills. Whether you are a beginner or an experienced developer, these functions will simplify your coding process and enhance your efficiency. 1. str_replace() – Replacing Strings in PHP One of the most common tasks in PHP Development is modifying text content. The str_replace() function helps you replace specific words or characters in a string. Syntax: str_replace(search, replace, subject, count) Example: $text = “I love JavaScript”; $newText = str_replace(“JavaScript”, “PHP”, $text); echo $newText; // Output: I love PHP This function is extremely useful for modifying content dynamically. 2. explode() – Splitting Strings into Arrays In PHP Development, you often need to break strings into arrays. The explode() function helps you split a string using a delimiter. Syntax: explode(separator, string, limit) Example: $sentence = “PHP,JavaScript,Python”; $array = explode(“,”, $sentence); print_r($array); Output: Array ( [0] => PHP [1] => JavaScript [2] => Python ) This function is helpful for handling CSV data and user inputs. 3. implode() – Joining Array Elements into a String The implode() function is the opposite of explode(). It converts an array into a string, which is essential in many PHP Development scenarios. Example: $array = [“PHP”, “JavaScript”, “Python”]; $string = implode(” – “, $array); echo $string; // Output: PHP – JavaScript – Python This function is useful for creating readable lists from array elements. 4. trim() – Removing Unwanted Spaces The trim() function removes extra spaces from the beginning and end of a string. It is a crucial function in PHP Development for cleaning user inputs. Example: $text = ” Hello PHP! “; echo trim($text); // Output: Hello PHP! Using trim() ensures cleaner data processing. 5. strlen() – Measuring String Length If you need to check the length of a string in PHP Development, strlen() is the best function. Example: $text = “PHP Development”; echo strlen($text); // Output: 15 This function helps in validating input lengths in forms. 6. array_merge() – Merging Arrays Merging multiple arrays is a common task in PHP Development. The array_merge() function helps combine two or more arrays into one. Example: $array1 = [“PHP”, “JavaScript”]; $array2 = [“Python”, “Ruby”]; $mergedArray = array_merge($array1, $array2); print_r($mergedArray); Output: Array ( [0] => PHP [1] => JavaScript [2] => Python [3] => Ruby ) This function is useful when managing large datasets. 7. array_push() – Adding Elements to an Array If you want to add elements to an existing array dynamically, array_push() is the perfect function for PHP Development. Example: $technologies = [“PHP”, “JavaScript”]; array_push($technologies, “Python”); print_r($technologies); Output: Array ( [0] => PHP [1] => JavaScript [2] => Python ) This function is useful when building dynamic arrays. 8. in_array() – Checking If an Element Exists in an Array To verify if a value exists in an array, in_array() is a powerful function in PHP Development. Example: $technologies = [“PHP”, “JavaScript”, “Python”]; if (in_array(“PHP”, $technologies)) { echo “PHP is in the list!”; } else { echo “PHP is not found!”; } This function helps in input validation and search functionalities. 9. json_encode() – Converting Data to JSON Format JSON is essential in PHP Development for API responses. The json_encode() function converts arrays and objects into JSON format. Example: $data = [“name” => “John”, “age” => 25]; echo json_encode($data); Output: {“name”:”John”,”age”:25} This function is crucial for handling API requests. 10. json_decode() – Converting JSON to PHP Arrays The json_decode() function converts a JSON string into a PHP array or object. Example: $json = ‘{“name”:”John”,”age”:25}’; $data = json_decode($json, true); print_r($data); Output: Array ( [name] => John [age] => 25 ) This function is helpful when receiving API responses. 11. date() – Working with Dates and Time In PHP Development, handling dates and times is common. The date() function allows you to format and display dates. Example: echo date(“Y-m-d”); // Output: 2025-03-30 (Current Date) This function is widely used in scheduling, logs, and reports. Conclusion Mastering these 11 PHP functions will significantly improve your PHP Development skills. These functions help in string manipulation, array operations, and working with JSON and dates. By using them effectively, you can write cleaner and more efficient code in your web applications. Whether you are building simple websites or complex applications, these functions will enhance your PHP Development journey. Keep practicing and implementing them in real-world projects to become a better PHP developer! Author portfolio

Scroll to Top